
Loadbalancing RADIUS on NSX ALB part 1
You really like redundancy, we all do. You really like loadbalancing, some of us do. Therefore, you might want to loadbalance your Cisco ISE PSNs. This presents a bit of a problem on any loadbalancer, but it’s every so slightly more complicated when you’re using ALB.
In Part 1, I’ll take a look at the problem statement, the topology and the “supporting” configuration.
You can find part 2 right about here
The problem
RADIUS is a fairly tricky protocol for loadbalancing. For two reasons:
- It requires persistence, without using cookies (duh) or source IP (because that is likely your wireless controller)
- Traffic through the loadbalancer cannot go through source NAT, as that breaks the protocol (as you end up authenticating the loadbalancer instead of the client)
The solution below is written with NSX Advanced Loadbalancer and Cisco ISE in mind, but the general principal will work for any loadbalancer.
Highlevel solution
- Configure an active/passive SE group with a floating IP, this will allow it to act as the default gateway for the RADIUS servers.
- Create a dummy virtual service
- Setup a NAT policy for CoA traffic
- Create a datascript for persistency
- Create a RADIUS healthmonitor, pools, vips and virtual services
Detailed steps
Topology
The topology is detailed in the image below.

The ISE servers are setup as dedicated PSNs. The version does not really matter. The ALB SEs are setup as active passive, and are part of a vSphere cloud.
I’ve used the following names and IPs:
| Item | Value |
|---|---|
| VRF | Global |
| SE group | SE_LAB_RADIUS |
| Networkservice | NS_LAB_RADIUS |
| NAT policy name | NAT_LAB_RADIUS |
| PSN subnet | 10.1.105.0/24 |
| floating IP | 10.1.105.1 |
| SE backend range | 10.1.105.5 - 10.1.105.7 |
| dummy VSVIP | 10.1.105.254 |
| frontend IP | 10.1.106.8 |
I’m assuming that the port group that will host the ISE servers already exists in vCenter.
1. Adding a new network
Given that the SE’s will function as the default gateway for the ISE servers, they’ll need an IP in the subnet.
- Navigate to Infrastructure > Cloud Resources > Networks and select the relevant cloud
- Find the network that will host the ISE PSN’s
- Click Add and enter the subnet in CIDR format
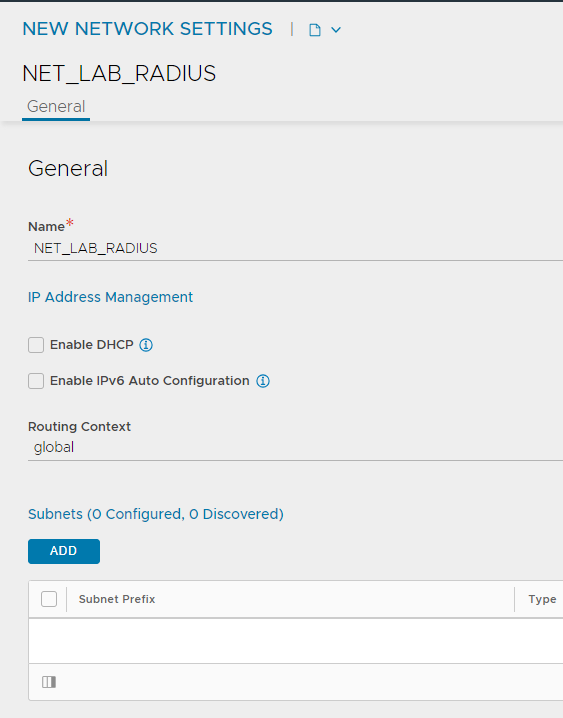
- Click Add again and add the address range that will be used by the SE’s, make sure to unselect Use Static IP Address for VIPs and SE and choose SE vNIC from the dropdown. Realistically, you should not need more than 3 IP’s here (2 for the live SE’s, one for an emergency replacement).
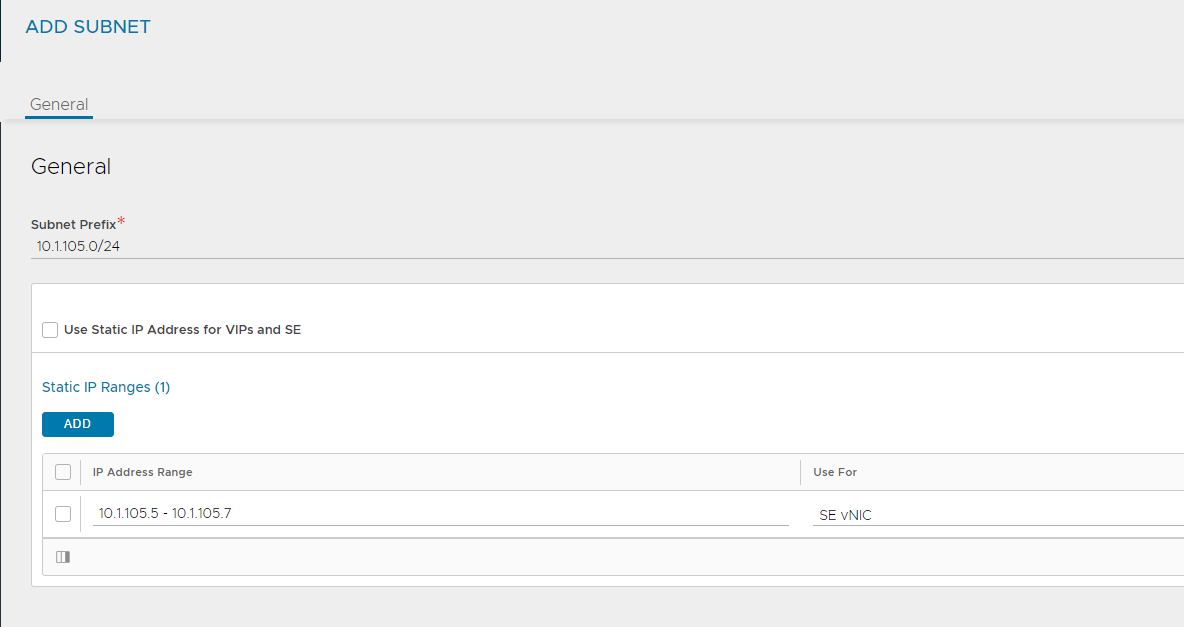
- Click Save
2. Create a NAT policy
With a normal IP routing setup, traffic to and from the PSNs will be routed without manipulation. This presents a problem for RADIUS CoA traffic as this is initiated from the PSNs. Without NAT, the RADIUS NAD’s would receive a CoA request from the ISE server itself, which it will drop as it should be configured to use the loadbalanced IP. We counter this by creating a NAT policy that will SNAT any traffic from the PSNs towards udp/1700 and udp/3799, behind the relevant RADIUS VS address. This policy is attached to the SE group through the network service. This is NOT visible in the UI!
The create the NAT policy, we can use the UI:
- Navigate to Template > Policies > NAT policy and click Create
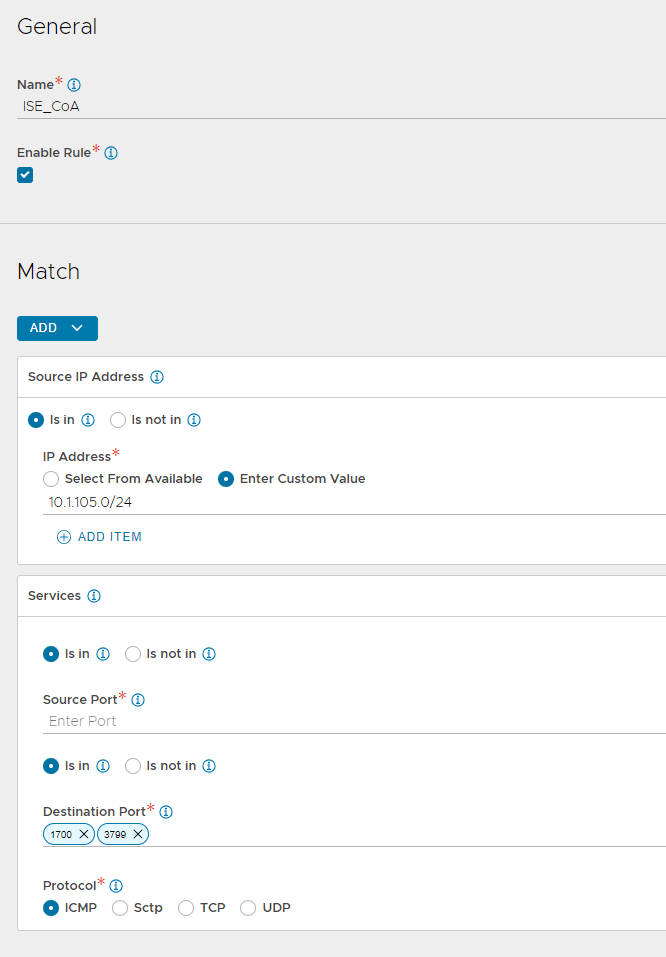
- Enter the name, and click Add
- Enter a name for the rule and make sure to select Enable Rule!
- Click Add underneath the match button and select Source IP Address
- Enter the PSN subnet (in CIDR format) as a custom value
- Click Add and select Services this time
- Leave source port empty, but add 1700 and 3799 as destination ports
- Select UDP as the protocol
- Click Add under Action and enter the VSVIP address that you will use to host the RADIUS virtual service
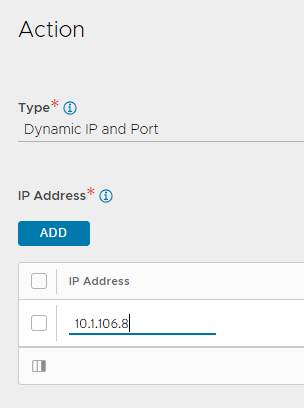
- Click Save twice
3. Enable the routing service and add a floating IP
If we want to use an SE to route things, you need to set up the routing service (obviously…). With version 18.2.5, routing was moved to the network services. This requires some CLI magic!
In addition, we’ll need to add a floating IP that will be used as the gateway IP. Make sure to save!
configure networkservice NS_RADIUS
    se_group_ref SE_LAB_RADIUS
    vrf_ref LAB
    service_type routing_service
        enable_routing
        floating_intf_ip 10.1.105.1
        enable_vip_on_all_interfaces
        nat_policy_ref NAT_LAB_RADIUS
    save
save
You can verify your settings by running the show command
[admin:lab-avictr-my-domain]: > show networkservice NS_LAB_RADIUS
+--------------------------------+-----------------------------------------------------+
| Field                          | Value                                               |
+--------------------------------+-----------------------------------------------------+
| uuid                           | networkservice-840d00e9-d949-4bl4-b36b-ac239def8e5b |
| name                           | NS_LAB_RADIUS                                       |
| se_group_ref                   | SE_LAB_RADIUS                                       |
| vrf_ref                        | Global                                              |
| service_type                   | ROUTING_SERVICE                                     |
| routing_service                |                                                     |
|   enable_routing               | True                                                |
|   routing_by_linux_ipstack     | False                                               |
|   floating_intf_ip[1]          | 10.1.105.1                                          |
|   enable_vmac                  | False                                               |
|   enable_vip_on_all_interfaces | True                                                |
|   advertise_backend_networks   | False                                               |
|   nat_policy_ref               | NAT_LAB_RADIUS                                      |
|   graceful_restart             | False                                               |
|   enable_auto_gateway          | False                                               |
| tenant_ref                     | admin                                               |
| cloud_ref                      | vcenter_lab                                         |
+--------------------------------+-----------------------------------------------------+
4. Create a dummy virtual service
In order for the SE vNIC’s to request an IP address in the ISE subnet, they actually need a VSVIP (and therefore a virtual service) in that subnet. This feels a bit dirty, but it’s by far the easiest way to get things running in my experience.
I won’t go over the steps in detail, as it’s the same as any other virtual service you are probably used to. Just make sure the IP address is in the same subnet as the backend, and that the backend pool is reachable.
Further Reading
This post was written based on my own experience with setting this up. Most of the raw information available in the ALB docs. You can find the detailed articles here:
https://avinetworks.com/docs/latest/default-gateway-ip-routing-on-avi-se/
https://avinetworks.com/docs/latest/configuring-network-service/
https://avinetworks.com/docs/latest/loadbalancing-radius-with-cisco-ise/
https://avinetworks.com/docs/latest/configuring-nat-on-avi-service-engine/