
Loadbalancing RADIUS on NSX ALB part 2
You still really like redundancy, we all do. And you must like (or need) loadbalancing, since you’re still here! In Part 2, I’ll dive into virtual service config!
You can find part 1 right about here
Short recap: in the previous part, I went over the topology, and the configuration of the service engines, the dummy VIP and the NAT policy. In this second part, I will detail the configuration of the virtual service and all it’s dependencies.
Health monitors
You generally want to make sure that you’re backend server is actually handling RADIUS requests, so a health monitor is needed!
- Navigate to Template > Profiles > Health Monitors and click Create
- Enter a name of your choosing
- Set the type to RADIUS
- Enter your preferred timing settings, which should be as low as you can get without generating false positives or creating too much load on your backend
- Enter the credentials of a test user. Consider using a dedicated user that is in the same identity store as your production users. This will allow for and end-to-end health check.
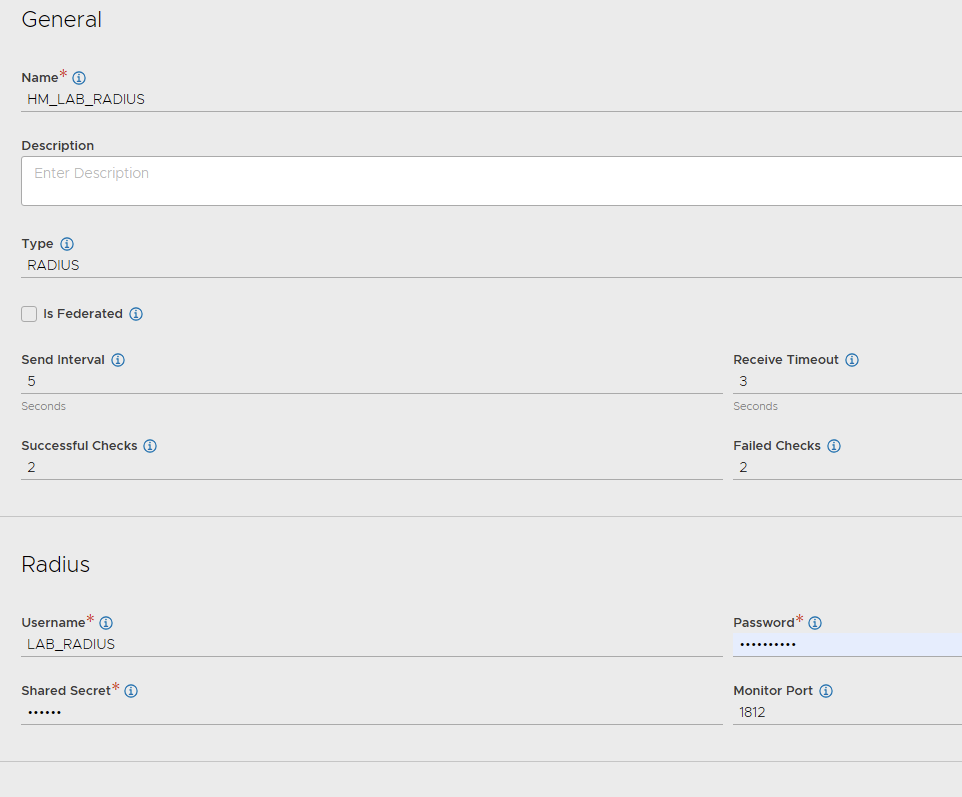
- Click Save
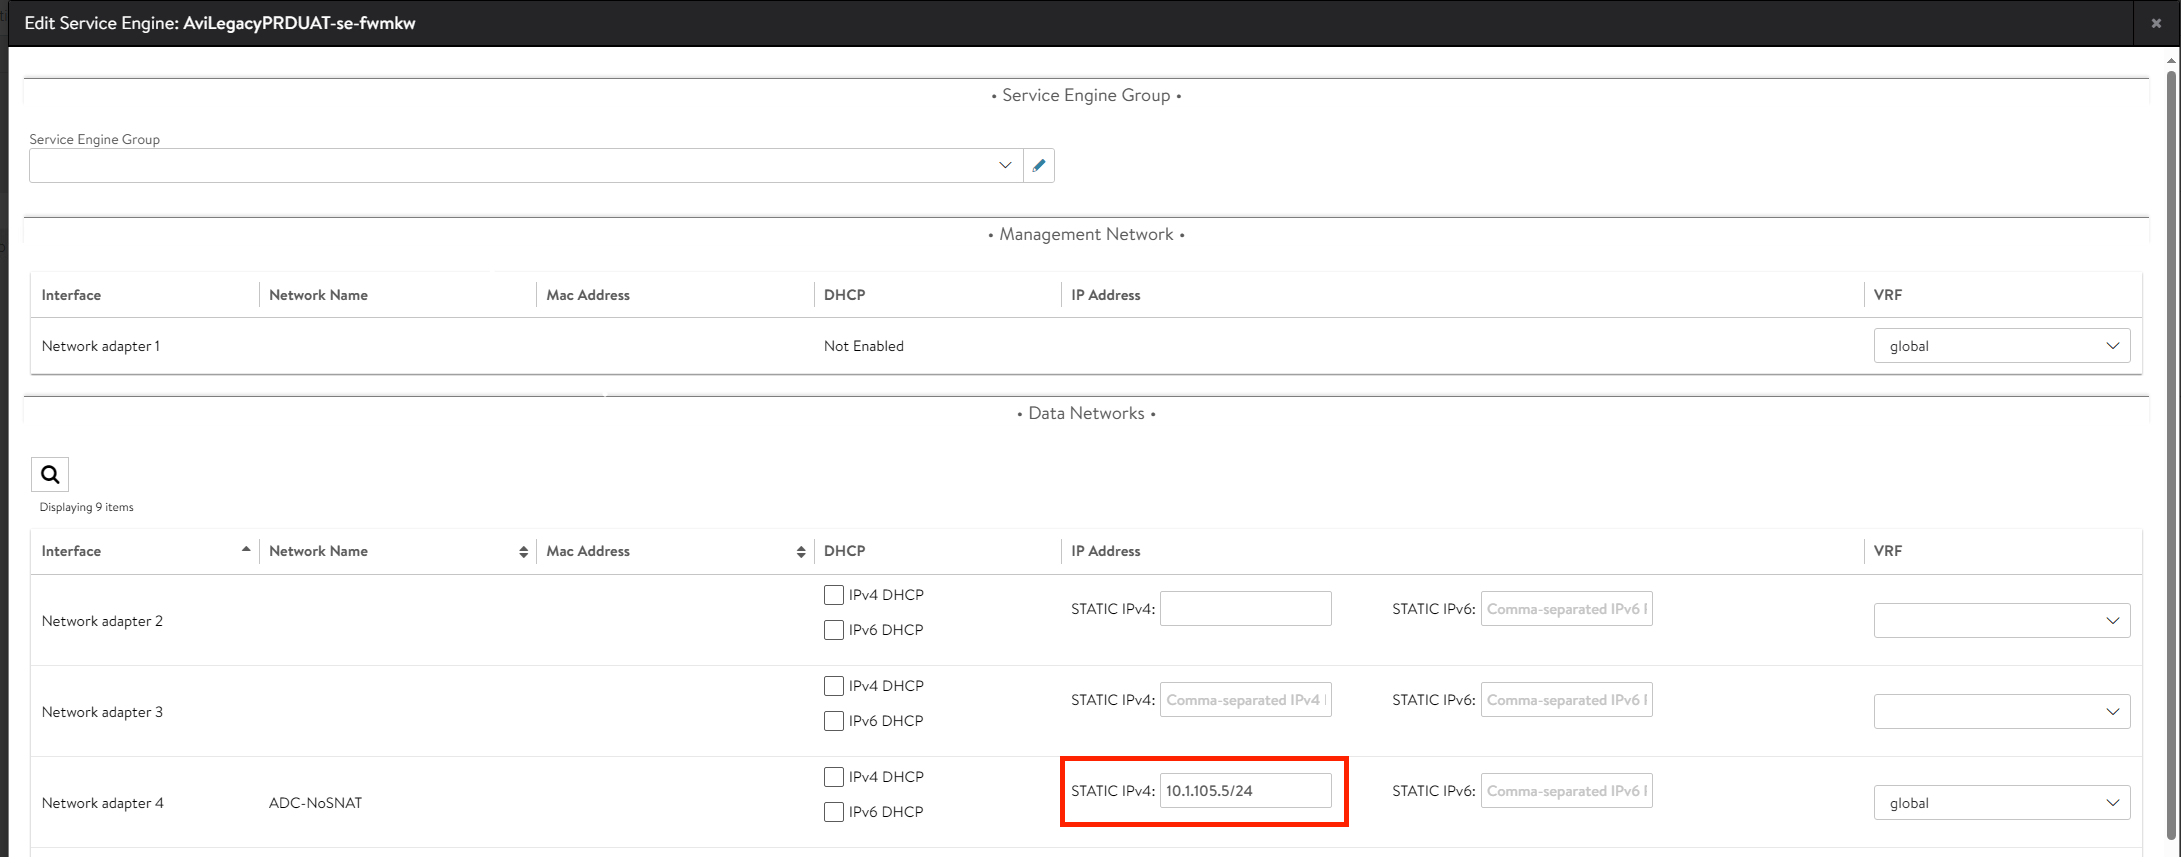
(Optional) Create a collection filter in ISE
Health monitor traffic is generally not very interesting for your logs, so it might make sense to exclude. I’ve used Collection Filters in ISE to make sure the RADIUS logs aren’t full of sessions started by the loadbalancer.
- Get the vNIC IP’s from AVI (Infrastructure > Cloud Resources > Service Engine > Edit button)
- In your ISE dashboard, navigate to Administration > System > Logging
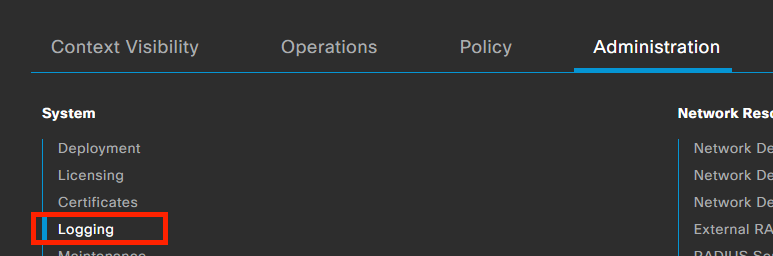
- Click Collection Filters and then click Add
- Set the attribute to Device IP Address and enter the IP address of your SE vNIC
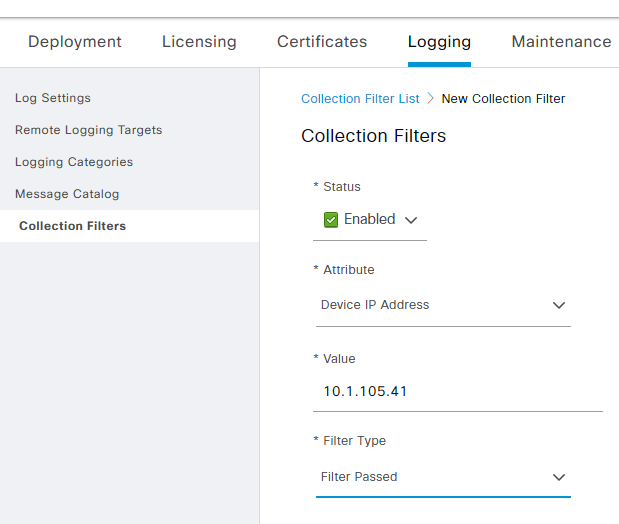
- Set the Filter Type to Filter Passed (this will give you logs if your test user fails, which is useful)
- Click Submit
- Repeat for the other SE vNIC IP
Add vNIC IP’s to ISE
While we’re at it, now is as good as time as any to add our SE vNIC IPs to ISE to make sure they’re allowed to send RADIUS requests to ISE.
- In ISE, navigate to Administration > Network Resourcers > Network Device
- Click Add
- Fill in a name for the SE and add the IP address
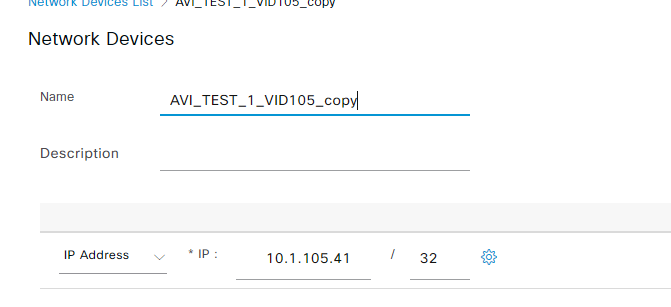
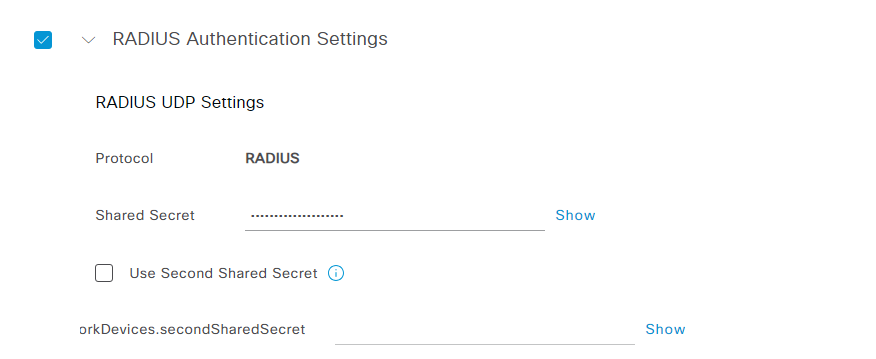
- Make sure to add the RADIUS Shared secret under RADIUS Authentication Settings
- All other settings will be specific to your deployment
- Repeat or the other SE and the floating IP you created earlier
RADIUS pool
With the health monitor in place, we can now create the backend pools. This is fairly straight forward for a change :)
- Navigate to Applications > Pools and click Create Pool
- Enter a name and add your Cloud and VRF Context
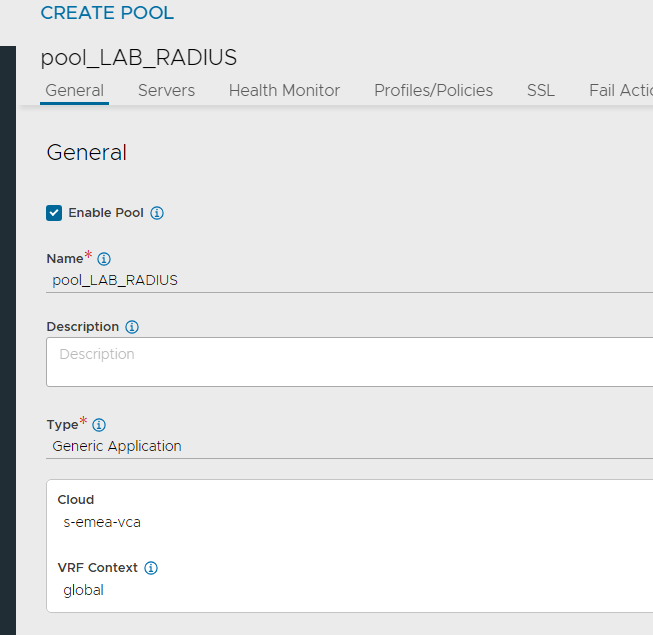
- Set the default port to 1812
- Add your ISE backend servers (by IP or FQDN, depending on your existing ALB config)

- Set the Healthmonitor to the monitor you created in the previous step
- Click Save
The persistence datascript
Now, for some of the black magic! RADIUS (or at least the ISE implementation of it) requires that you handle your entire session on the same host. Source IP is also not great as often requests are relayed through something like a wireless controller. The Datascript below will parse the incoming request and set persistence based on the incoming RADIUS request. This is a fairly complicated script, and there’s no point in writing it yourself is someone else already did it. In this case the fine folks at AVI already did the heavy lifting for us. See this link for more details on how the datascript works.
Configuration wise, follow these steps:
- Navigate to Templates > Scripts > DataScripts and click Create
- Enter a name and select the pool your created earlier under Pools
- Select Default-Radius and Default-DHCP for Protocol Parser
- Scroll down to Events,click Add and select L4 Response
- Paste the code found here, making sure to replace l4-radius-pools with your own pool!
- Click Save
VSVIP
Even easier then than the pools! This will differ from deployment to deployment (you might use manual VS VIP assignments or IPAM). If you’re reading this, you probably know how to create a VS VIP object though. Just in case, I’ve added the basic steps for a manual VIP below
- Navigate to Applications > VS VIPs and click Create
- Enter a name and add your Cloud and VRF Context
- Click Add under VIPs
- Enter the IP you want to use
- Click Save
(Optional) Create a dedicated application profile
This is not required, but highly recommended. You could update the settings of the default profile (System-L3-Application), but generally recommend against doing so.
- Navigate to Templates > Profiles > Application and click Create
- Enter a name and set the type to L4
- Make sure the Preserve Client IP Address checkbox is select
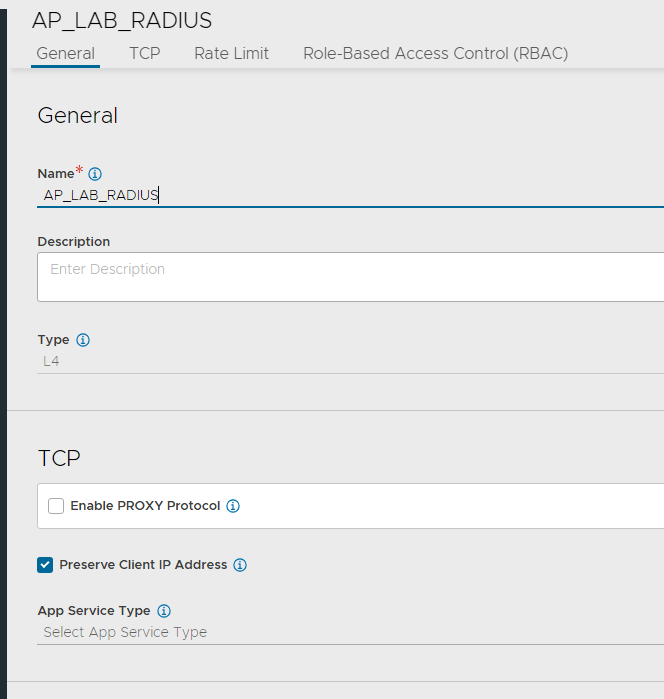
- Click Save
Virtual service
With all that out of the way, we can finally get to the virtual service.
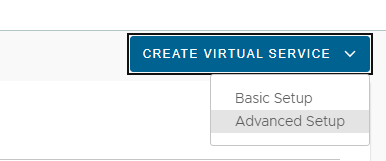
- Navigate to Applications > Virtual Services and click Create Virtual Service > Advanced Setup
- Select your Cloud and click Next
- Select your VRF Context and click Next
- Enter a name for your VS
- Under VIP Address, select the VS VIP you create before
- Under Profiles, set TCP/UDP Profile to System-UDP-Fast-Path and the Application Profile to the profile you just created
- Under Pool, select the pool you created before
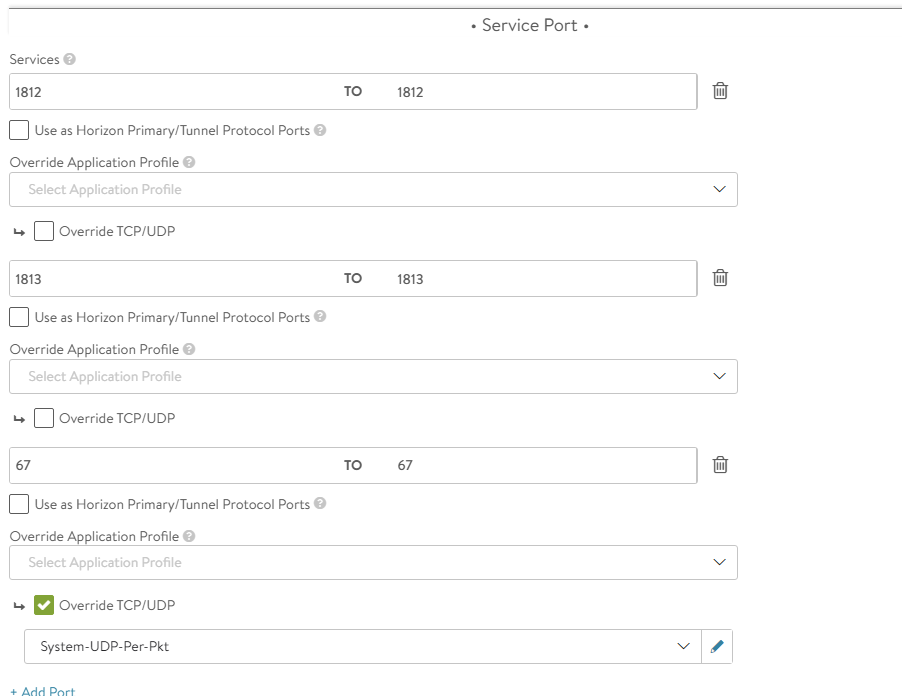
- Under Service Port, click Switch to Advanced

- Add 1812 as a service and click Add port
- Add 1813 as a service and click Add port again
- Finally, add 67 as a service, check Override TCP/UDP and select System-UDP-Per-Pkt
- (we’re almost done, I promise) Click Next and you’ll go to the Policies page. then click DataScripts
- Click Add DataScript, select the datascript you created before and click Save DataScript
- Click Next to proceed to the Advanced Page
- Under Other Settings select the correct Service Engine Group
- Finally, click Save
Further Reading
I’ll mention it again :) This post was written based on my own experience with setting this up. Most of the raw information available in the ALB docs. You can find the detailed articles here:
https://avinetworks.com/docs/latest/default-gateway-ip-routing-on-avi-se/
https://avinetworks.com/docs/latest/configuring-network-service/
https://avinetworks.com/docs/latest/loadbalancing-radius-with-cisco-ise/
https://avinetworks.com/docs/latest/configuring-nat-on-avi-service-engine/